参考文档地址:
这是一个基于 Spring AI MCP auto-configuration 和 boot starters 的快速入门演示。
系统要求
已安装 Java 17 或更高版本。 Spring Boot 3.3.x 或更高版本
设置你的环境
使用 Spring Initializer来 bootstrap 项目。
你需要添加以下 dependencies:
<dependency>
  <groupId>org.springframework.ai</groupId>
  <artifactId>spring-ai-starter-mcp-server-webmvc</artifactId>
  <version>1.0.0-SNAPSHOT</version>
</dependency>
然后通过设置 application properties 来配置你的 application:
spring.application.name=majj-mcp-server

spring.main.banner-mode=off
logging.pattern.console=

logging.file.name=mcp-server.log


spring.ai.mcp.server.name=majj-mcp-server
spring.ai.mcp.server.version=0.0.1
#spring.ai.mcp.server.type=SYNC
#spring.ai.mcp.server.stdio=false
spring.ai.mcp.server.instructions=majj mcp server demo
Server Configuration Properties 文档记录了所有可用的 properties。
现在让我们深入构建你的服务器。
构建你的服务器
Num Service
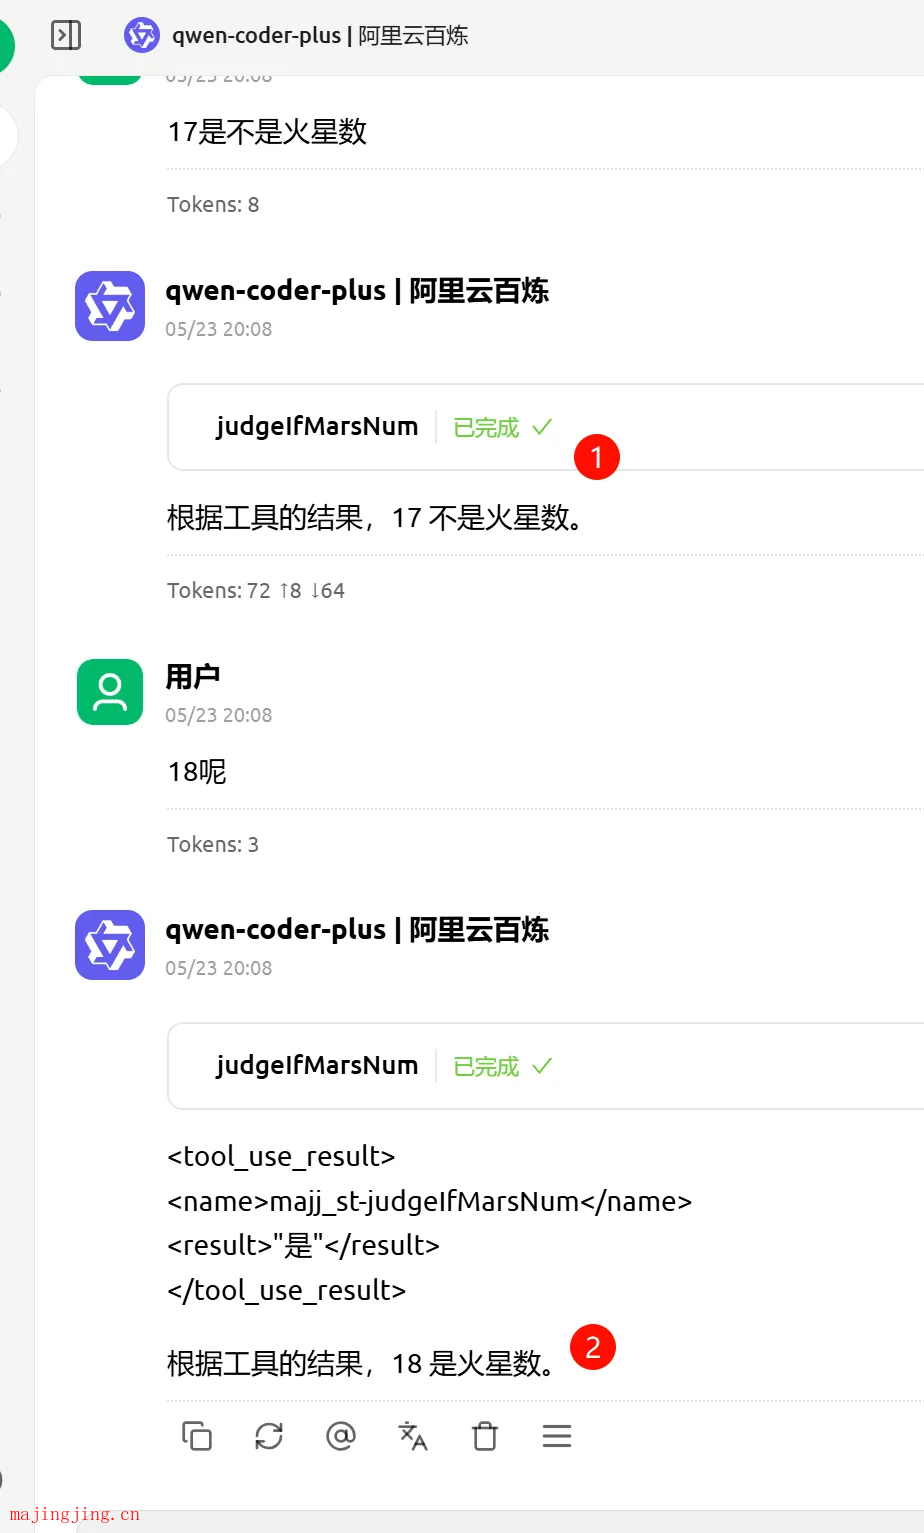
让我们实现一个 NumService,用它来判断一个数字是不是火星数
@Service
public class NumService {

    @Tool(description = "判断一个数字是不是火星数")
    public String judgeIfMarsNum(@ToolParam(description = "待判断的数") Integer num) {
        boolean bool = String.valueOf(num).contains("8");
        return bool ? "是" : "不是";
    }

}
@Serviceannotation 将在你的 application context 中自动注册该 service。
Spring AI @Tool annotation,使其易于创建和维护 MCP tools。
auto-configuration 将自动向 MCP server 注册这些 tools。
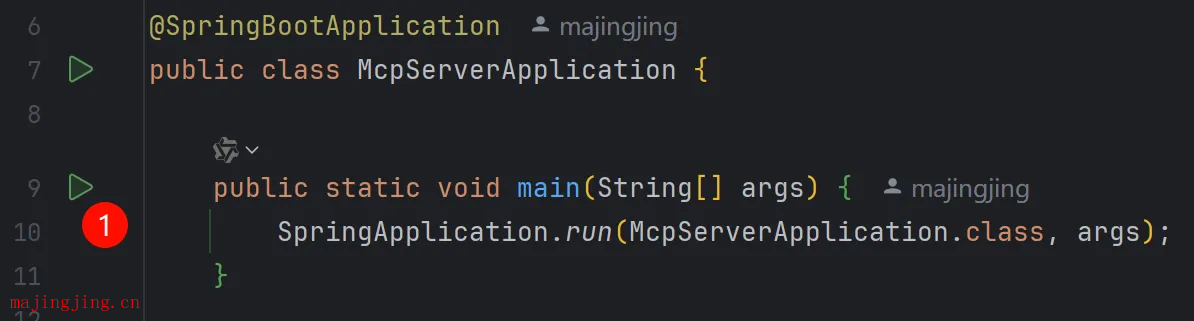
创建你的 Boot Application
@SpringBootApplication
public class McpServerApplication {

    public static void main(String[] args) {
        SpringApplication.run(McpServerApplication.class, args);
    }

    @Bean
    public ToolCallbackProvider numTools(NumService numService) {
        return MethodToolCallbackProvider.builder().toolObjects(numService).build();
    }


}
使用 MethodToolCallbackProvider utils 将 @Tools 转换为 MCP server 使用的可操作 callbacks。
运行 server
最后,让我们 build server:
./mvnw clean install
这将在 target 文件夹中生成一个springboot-mcp-server-1.0.0-SNAPSHOT.jar file。
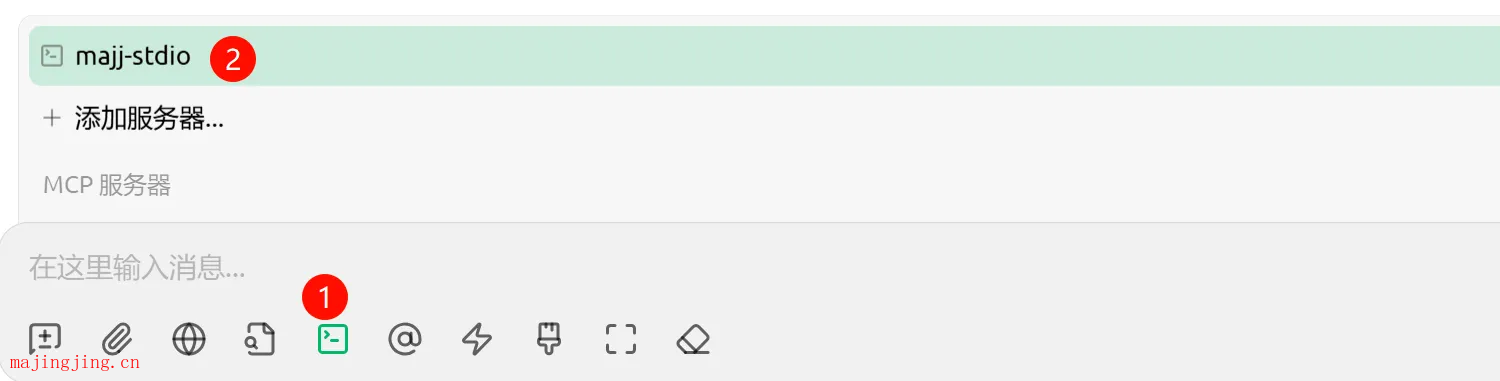
使用 Cherry Studio 测试你的server
使用stdio类型

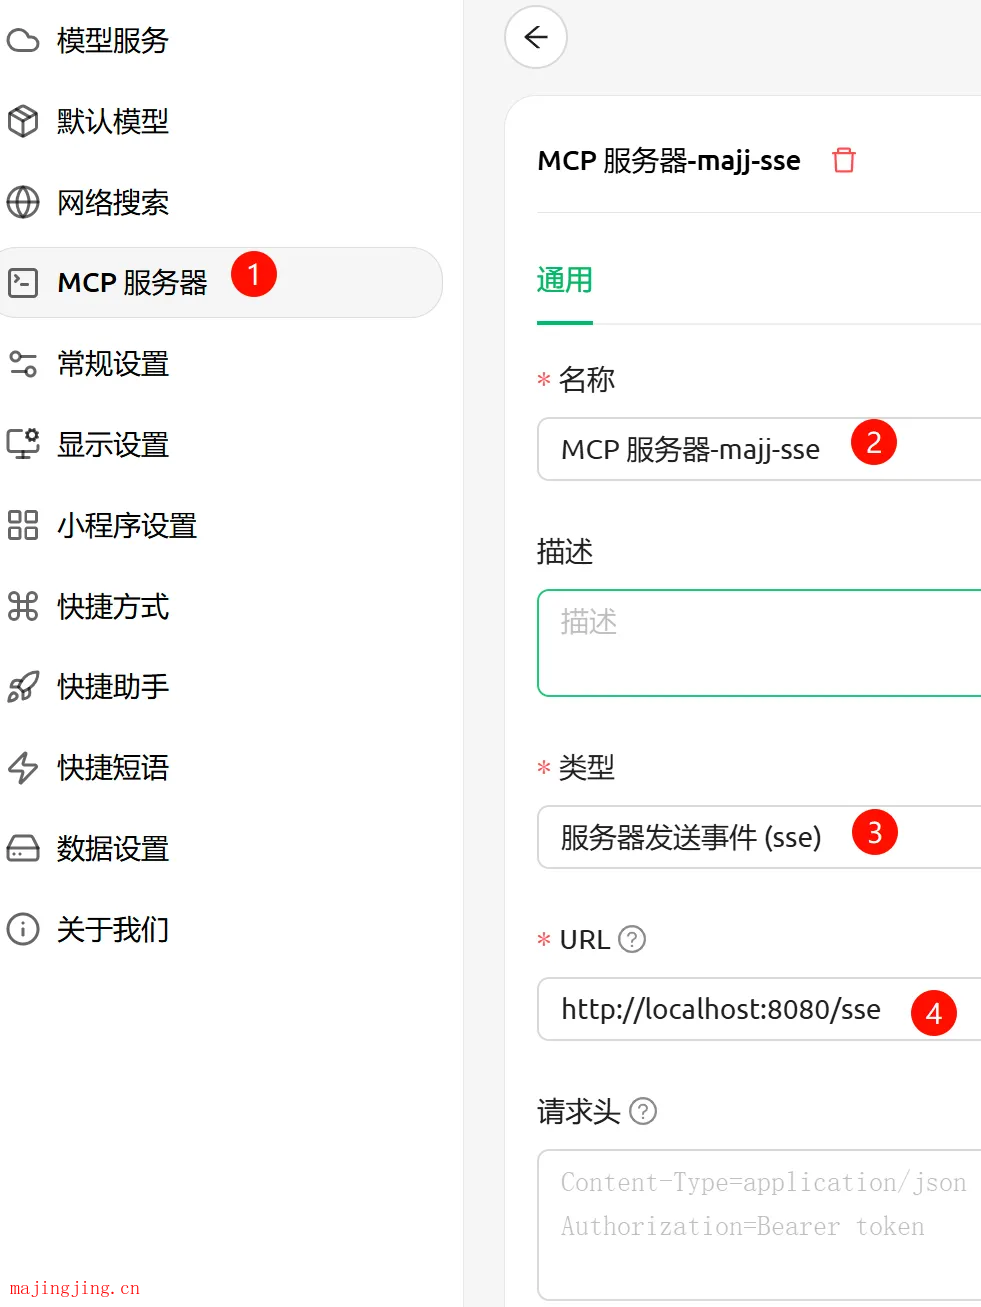
使用sse类型
启动服务端程序
返回聊天窗口, 验证结果同stdio类型示例
使用mcp-client code 验证
public class SampleClient {
private final McpClientTransport transport;
public SampleClient(McpClientTransport transport) {
this.transport = transport;
}
public void run() {
var client = McpClient.sync(this.transport)
.sampling(request -> {
System.out.println("收到一个新消息: " + request);
return CreateMessageResult.builder()
.content(new McpSchema.TextContent("Bla bla bla"))
.build();
})
.build();
client.initialize();
client.ping();
// List and demonstrate tools
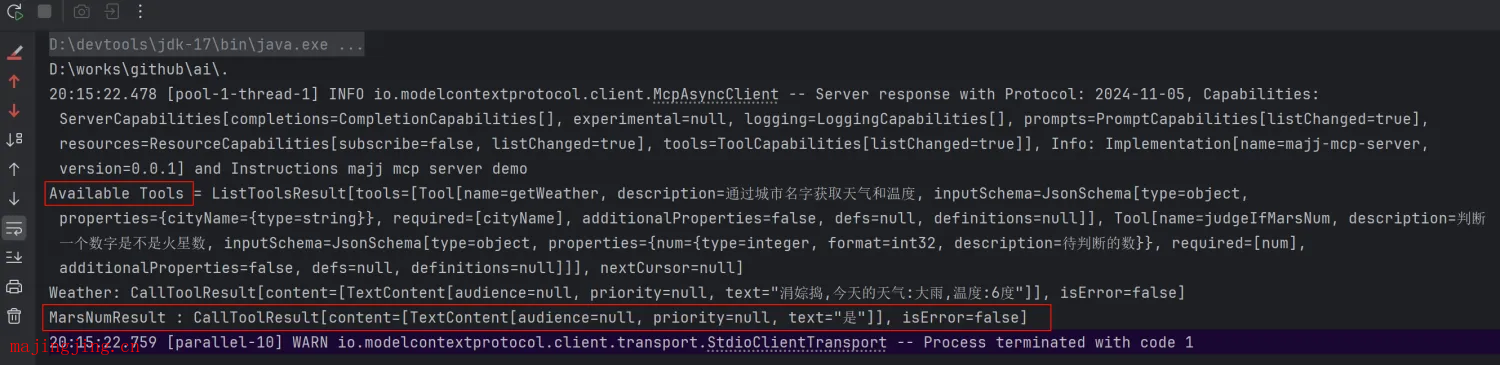
ListToolsResult toolsList = client.listTools();
System.out.println("Available Tools = " + toolsList);
CallToolResult weatherForcastResult = client.callTool(new CallToolRequest("getWeather",
Map.of("cityName", "上海", "toolContext", new ToolContext(Map.of()))));
System.out.println("Weather: " + weatherForcastResult);
CallToolResult marsNumResult = client.callTool(new CallToolRequest("judgeIfMarsNum",
Map.of("num", 88, "toolContext", new ToolContext(Map.of()))));
System.out.println("MarsNumResult : " + marsNumResult);
client.closeGracefully();
}
}
使用stdio类型
public class ClientStdio {

    public static void main(String[] args) {

        System.out.println(new File(".").getAbsolutePath());

        var stdioParams = ServerParameters.builder("java")
                .args("-Dspring.ai.mcp.server.stdio=true",
                        "-Dspring.main.web-application-type=none",
                        "-Dlogging.pattern.console=", "-jar",
                        "springboot-mcp-server/target/springboot-mcp-server-1.0.0-SNAPSHOT.jar")
                .build();

        var transport = new StdioClientTransport(stdioParams);

        new SampleClient(transport).run();
    }

}
使用sse类型
public class ClientSse {

    public static void main(String[] args) {
        var transport = HttpClientSseClientTransport.builder("http://localhost:8080").build();
        new SampleClient(transport).run();
    }

}
执行结果如下
 打赏下吧
打赏下吧